Fail2ban for WordPress: Block Brute-Force Attacks at the Server Level

Every public WordPress site gets brute-forced. Bots hammer wp-login.php, flood xmlrpc.php, and walk the REST API looking for usernames, thousands of attempts a day on a site nobody has heard of. The usual answer is a security plugin that locks out an IP after N failed logins. That works, but it works in the worst possible place: inside PHP, after WordPress has already booted for every single attempt. Fail2ban moves the fight to the front door, banning attackers at the firewall before a single line of PHP runs.
This guide sets up Fail2ban to protect WordPress at the server level: logging failed logins, matching them with a filter, and dropping repeat offenders in the firewall. It is the difference between absorbing an attack and refusing it.
How bad is the brute-force problem, really?
If you have never watched a fresh WordPress site’s logs, the volume is startling. Within hours of a domain resolving, automated scanners find it and begin trying common usernames against wp-login.php: admin, the domain name, the first post’s author slug. A modest site routinely logs hundreds to thousands of failed login attempts a day, none of them human, all of them cheap for the attacker and expensive for you if each one boots WordPress.
The economics are the whole story. An attacker rents a botnet and sprays credentials across thousands of sites at once; the cost per attempt is nearly zero for them. On your side, every attempt that reaches PHP costs a process, a database connection, and memory. Fail2ban flips that asymmetry back in your favor: after a handful of attempts, the attacker’s packets are dropped for free at your firewall while they keep paying to send them. You want the cost of attacking you to land on the attacker, not on your server.
Why server-level beats plugin-level
A login-limiter plugin has to load WordPress to decide whether to block a request. That means every one of those thousands of daily attempts spins up PHP, connects to the database, and runs the plugin, just to be told no. Under a real brute-force flood, that overhead alone can take a small server down; the lockout works while the site falls over from the load of enforcing it.
Fail2ban sits below WordPress entirely. It watches your logs, and when an IP crosses a threshold it adds a firewall rule that drops that IP’s packets. The next attempt never reaches the web server, never touches PHP, never queries the database. You stop paying for the attack. That is why hosts and serious operators run Fail2ban alongside, not instead of, application-level measures.
How Fail2ban works
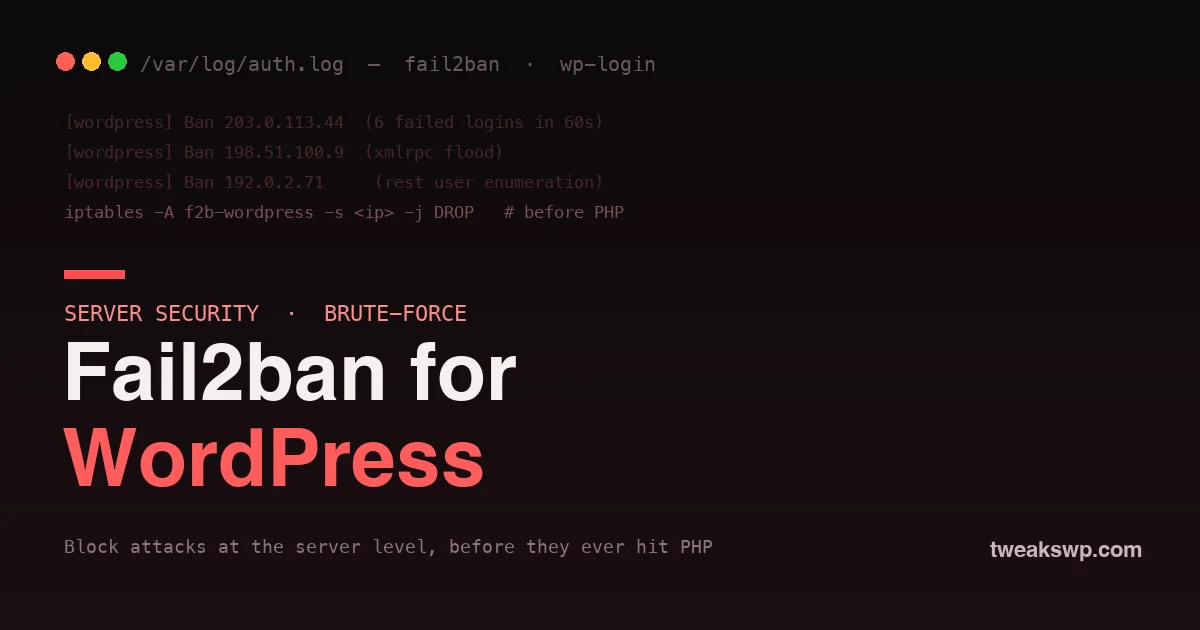
Three pieces do the job. A filter is a regular expression that recognizes a bad event in a log file, such as a failed WordPress login. A jail ties a filter to a log path and a policy: how many matches, in what window, earn how long a ban. And an action applies the ban, usually by inserting an iptables or nftables rule. Fail2ban tails your logs, counts matches per IP, and bans the ones that cross the line.
Step 1: Install Fail2ban
sudo apt update && sudo apt install fail2ban    # Debian / Ubuntu
sudo systemctl enable --now fail2ban
It ships with a working default for SSH. WordPress needs a custom filter and jail, because Fail2ban does not know what a failed WordPress login looks like until you tell it.
Step 2: Make WordPress log failed logins
Fail2ban can only ban what it can see in a log. WordPress does not write failed logins to a file by default, so add a tiny must-use plugin that does, hooking the core wp_login_failed action:
<?php
// wp-content/mu-plugins/log-failed-logins.php
add_action( 'wp_login_failed', function ( $username ) {
    $ip  = $_SERVER['HTTP_CF_CONNECTING_IP'] ?? $_SERVER['REMOTE_ADDR'] ?? '-';
    $log = '/var/log/wp-auth.log';
    $line = sprintf( "%s WordPress auth failure for %s from %s\n",
        date( 'c' ), sanitize_user( $username ), $ip );
    error_log( $line, 3, $log );
} );
The HTTP_CF_CONNECTING_IP check matters if you sit behind Cloudflare or another proxy; without it every attacker looks like the proxy’s IP and you would ban the proxy, not the bot. Make sure the log file is writable by the web server and readable by Fail2ban.
Step 3: Write the Fail2ban filter
Create a filter that recognizes those log lines. Save it as /etc/fail2ban/filter.d/wordpress.conf:
[Definition]
failregex = ^.* WordPress auth failure for .* from <HOST>$
ignoreregex =
The <HOST> token is how Fail2ban extracts the offending IP from each matching line. Everything else is literal text matching the format the mu-plugin writes.
Step 4: Configure the jail
Now tie the filter to the log and set the policy. Add this to /etc/fail2ban/jail.local:
[wordpress]
enabled  = true
filter   = wordpress
logpath  = /var/log/wp-auth.log
maxretry = 5
findtime = 300
bantime  = 3600
This bans an IP for an hour (bantime) after five failed logins (maxretry) within five minutes (findtime). Tune to taste: repeat offenders can earn escalating bans by enabling Fail2ban’s recidive jail. Reload to apply:
sudo systemctl reload fail2ban
sudo fail2ban-client status wordpress
Picking the right thresholds
The numbers in the jail are a policy choice, not a fixed rule. Too strict and you risk locking out a real user who fumbled a password on a bad-connection day; too loose and an attacker gets more free guesses than they should. The default of five failures in five minutes is a reasonable middle for most sites: comfortably above human error, well below what a bot needs to make progress. If your audience is technical and rarely mistypes, you can tighten to three. If you run a large membership site where password fumbles are common, loosen slightly and lean on the recidive jail to catch the persistent offenders. Watch your own logs for a week after setup and adjust from what you actually see, rather than guessing.
Step 5: Cover XML-RPC and REST enumeration too
Logins are one vector. Attackers also flood xmlrpc.php to amplify brute-force and walk the REST API to harvest usernames. If you are not using XML-RPC, disabling it removes the vector entirely; our guide to disabling XML-RPC and REST user enumeration covers that. For the traffic you cannot disable, point additional Fail2ban jails at your web server’s access log, matching bursts of POST /xmlrpc.php or repeated GET /wp-json/wp/v2/users from one IP, and ban the same way. The pattern is identical: recognize the abuse in a log, then drop the source.
Escalating repeat offenders with the recidive jail
A one-hour ban is enough to break a live attack, but the same IPs often come back. Fail2ban ships a recidive jail for exactly this: it watches Fail2ban’s own log and hands out long bans to addresses that keep getting banned. Enable it in jail.local:
[recidive]
enabled  = true
logpath  = /var/log/fail2ban.log
bantime  = 604800   # one week
findtime = 86400    # over a day
maxretry = 5        # banned 5 times in a day = gone for a week
Now an IP that trips your WordPress jail five times in a day earns a week-long ban instead of another hour. Persistent attackers effectively remove themselves from your traffic, and the noise in your logs drops noticeably over the first week or two of running it.
Step 6: Test and monitor
Verify the jail is live and watch it work:
# See banned IPs and stats
sudo fail2ban-client status wordpress
# Unban an address (for example, your own after testing)
sudo fail2ban-client set wordpress unbanip 203.0.113.10
Deliberately fail a login a few times from a throwaway IP and confirm it lands in the ban list. Then leave it running; within a day a public site’s jail will have collected a steady stream of real attackers, each one now bounced at the firewall instead of at the login form.
Gotchas worth knowing
- Proxy IPs. Behind Cloudflare, a CDN, or a load balancer, log the real client IP (as the mu-plugin does) or you will ban the proxy and lock everyone out.
- Whitelist yourself. Add your own office or VPN IP to Fail2ban’s
ignoreipso a bad password does not lock you out of your own site. - Log rotation. Make sure your custom log rotates, or it grows without bound. A simple logrotate entry handles it.
- It complements, not replaces. Fail2ban stops the volume; strong passwords, two-factor, and a current WordPress still matter for the attempts that get through.
What Fail2ban does not solve
Fail2ban is a volume tool; it stops the flood, not every drop. It will not help against a credential-stuffing attack that succeeds on the first try because a password was reused and leaked, so real password hygiene and two-factor still matter. It will not patch a vulnerable plugin, so keeping software current remains non-negotiable. And it will not stop a distributed attack that uses a fresh IP for each attempt, which is where edge protection like a CDN’s rate limiting earns its place. Think of Fail2ban as one layer: it makes brute-force uneconomical, freeing the rest of your defenses to focus on the smarter attacks that get past sheer volume.
Where Fail2ban fits in a hardening stack
Fail2ban is one layer of a defense that works in tiers. At the edge, a CDN or firewall filters obvious junk before it reaches your server. At the host, Fail2ban bans the persistent sources that get through. At the application, WordPress itself enforces strong passwords, two-factor, and least-privilege roles. And underneath it all, keeping WordPress, plugins, and PHP current shrinks the set of flaws any of those attackers can actually exploit. No single tier is enough alone; Fail2ban’s job is the middle one, turning a loud, sustained assault into a handful of dropped packets so the other tiers face less volume.
Frequently asked questions
Do I need root or a VPS for this?
Yes. Fail2ban runs at the operating-system level and edits firewall rules, so it needs root on a VPS or dedicated server. On managed shared hosting you cannot install it, though many managed hosts run their own equivalent for you.
Will Fail2ban block legitimate users?
Rarely, if your thresholds are sane and you whitelist your own addresses. Five failures in five minutes is well beyond a human fat-fingering a password, so real users almost never trip it. The bans are short by default anyway.
Is this better than Cloudflare’s rate limiting?
They work at different layers and pair well. Cloudflare stops a lot at the edge before it reaches your server; Fail2ban catches what gets through and bans persistent sources at the host. Running both is defense in depth, not redundancy.
How much does Fail2ban reduce server load under attack?
Substantially, because banned requests are dropped by the firewall before PHP or the database do any work. The exact number depends on the attack, but moving thousands of daily attempts from full WordPress boots to dropped packets is the entire point.
Can I use nftables instead of iptables?
Yes. Modern Fail2ban supports nftables actions, and on newer distributions that is the default. The filter and jail you wrote do not change; only the ban action underneath differs.
Where do I see what Fail2ban has blocked?
Run fail2ban-client status wordpress for the current ban list and totals, and read /var/log/fail2ban.log for the full history of bans and unbans. Both update live as the jail works.
Will a ban break my site for legitimate visitors sharing an IP?
A ban blocks a single IP, so users behind that exact address are affected only if the attack came from it. Because bans are short and triggered by clear abuse, this is rare in practice; corporate or shared-NAT addresses are the edge case to watch, which is another reason to keep thresholds sensible.
Does Fail2ban work with a firewall like UFW?
Yes. Fail2ban inserts its own rules and coexists with UFW or firewalld. On most modern systems it uses nftables underneath automatically, so you do not have to configure the firewall layer by hand for it to work.
Should I still use a security plugin with Fail2ban?
Yes, they cover different ground. Fail2ban handles volume at the server; a good security plugin adds two-factor, file-integrity monitoring, and application-level rules Fail2ban cannot see. Run both and let each do what it is best at.
How soon will I see Fail2ban working?
Almost immediately on a public site. Because bots are constantly probing, a fresh WordPress jail usually records its first real bans within hours, and the ban list fills steadily from there. You do not have to wait for an attack; one is already underway.
The bottom line
Application-level login limiters fight brute-force in the most expensive place, inside PHP, after WordPress has already paid to handle the request. Fail2ban fights it at the firewall, where a banned attacker’s packets are dropped before they cost you anything. Log your failed logins, write a filter that recognizes them, set a jail with a sensible threshold, and extend the same pattern to XML-RPC and REST abuse. Combined with keeping WordPress current so attackers have fewer flaws to aim at, as the patch-gap problem shows they will, server-level banning turns a constant, load-generating assault into background noise your firewall quietly absorbs.


